Default filing options |


|
Default filing options |
|
If configured during installation, the user can set each of the following preferences to suit their own requirements when filing. These will then be used by default each time a message is filed. To change any of the preferences when in the process of filing a message, use the Options... button to open the "Filing options" window.
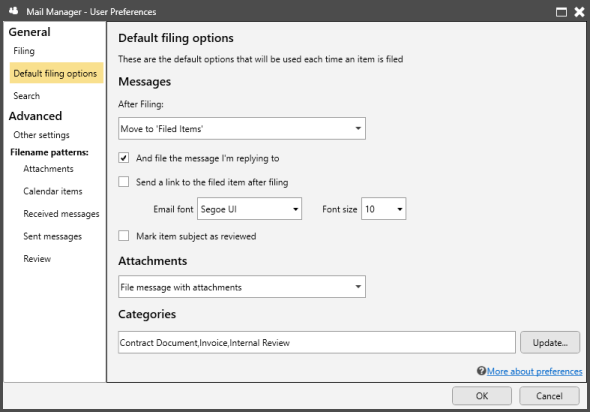
Move to 'Filed Items': Once a copy has been filed the original will be moved to the Outlook folder called Filed Items.
Move to 'Deleted Items': Once a copy has been filed the original will be moved to the Outlook folder called Deleted Items.
Append filed date & time to subject line: The subject line of the original message will be modified to indicate when it was filed.
After sending a reply to a message, the message you are replying to will also be filed into the same location.
Rather than forwarding or copying a message on to others and creating duplicates, Mail Manager can be used to file a single message and automatically generate a notification email containing links to the message (once filed). This "lightweight" email can be sent to other colleagues. Upon receipt the colleagues can select the links to open the filed message. The default font used for the notification email can be controlled as required.
To identify to other colleagues that you have reviewed or seen the message, in a similar way that you might initial or sign a paper document, you can update the subject line to include when you reviewed the message. The precise wording used can be configured via the Filename patterns.
When attachments are included in the message the following default actions are available:
File message with attachments:
File message and copy attachments:
File attachments only:
Also see: Filing attachments

To enable the use of categories in the Filing window, select the Update... button.
Using the Categories Editor Add, Edit or Delete the categories you require:
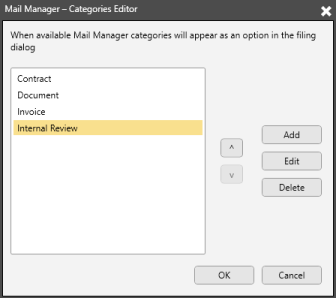
Select OK to save
Note: Categories can be shared with users via Admin Preferences