Filing with Mail Manager
There are several ways to file messages with Mail Manager.
-
Files using your default 'After Filing' options, all other options are ignored.
-
The default filing options can be changed via the User Preferences window.
-
Files using your default 'After Filing' options, all other options are ignored.
-
The default filing options can be changed via the User Preferences window.
-
From an Outlook folder select a message or messages to be filed
-
Select the File Email button from the Mail Manager toolbar in the ribbon, or right-click and select the File Email option as shown above
-
From the menu select More locations and options...
-
Choose a filing location, from the list (If required, you can filter the list by typing relevant text)
-
Select the File button (or use Alt + F) to file the message
Mail Manager learns where you save your messages and is able to suggest suitable locations. This is an automatic process, saving you time and effort, and helps you save your messages in a consistent manner.
1. Try using the location filter to quickly find a location from a long list. Use the Tab key to move to the Location filter, Shift + Tab and then use the Down Arrow key to select a location.
2. If activated via the User Preferences double-click the location instead of selecting the File button
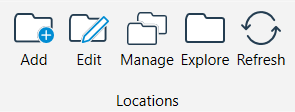
Tools for Managing Locations

|
Add | Opens the Add a location when filing to create a new filing location |

|
Edit | Opens the collection file with the selected location allowing you to edit the description or path |

|
Manage | Opens the Locations tool. |

|
Explore | Opens the location folder with Windows Explorer (only available with file system folders) |

|
Refresh | Refresh the list of locations |
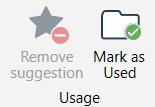
Tools for Managing Usage

|
Remove Suggestion | When filing a sent or received message, Mail Manager may suggest a filing location based on previous behavior. If you want to remove this association select the "Remove Suggestion" button. Available only when a suggested location has been selected |
|
|
Mark as Used | When the "Only search locations I use" is selected in the User preferences unused locations will not be search-able. Used locations denoted by bold text |
|
|
Mark as Unused | Unused locations are denoted by regular text. |
Tool for Selecting Multiple Locations

|
|
Select Multiple |
Toggle on or off the Select Multiple button when you need to file messages to more than one location. When enabled you can filter and select multiple locations as required. Selected locations can also be removed. |
The list of filing locations can be reduced by using the "Filter locations" and typing a suitable phase related to your location.
The list can also be reduced by using the drop down menus:
Locations:

Filter by text in a column:

The following right-click options are available from the File message window:
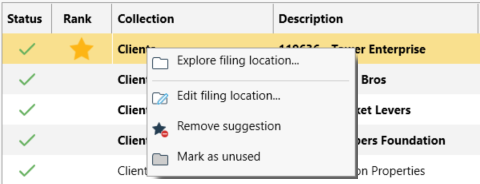
Explore filing location...
-
Opens the location folder with Windows Explorer
-
Only available with file system folders.
Edit filing location...
-
Opens the collection file containing the selected location allowing you to edit the description or path with the Locations tool.
Remove suggestion
-
Available when a suggested location has been selected.
-
When filing a sent or received message Mail Manager may suggest a filing location based on previous behavior.
-
If you want to remove the association between the filing location and who the message was sent to or received from then choose the "Remove from suggested list" option.
Mark as used/unused
-
Used/unused locations denoted by bold/regular text respectively.
-
When the "Only search locations I use" is selected in the User Preferences, unused locations will not be search-able.
Upon opening the filing window:
-
Select the Enter key to file to the highlighted location
-
Selecting the Up or Down arrows will move the focus to the list of locations in the respective direction, then select Enter to file
-
Select Shift+Tab to move the focus to the Filter location text box and type as required.
-
Use the arrow and enter keys to select the required location and file
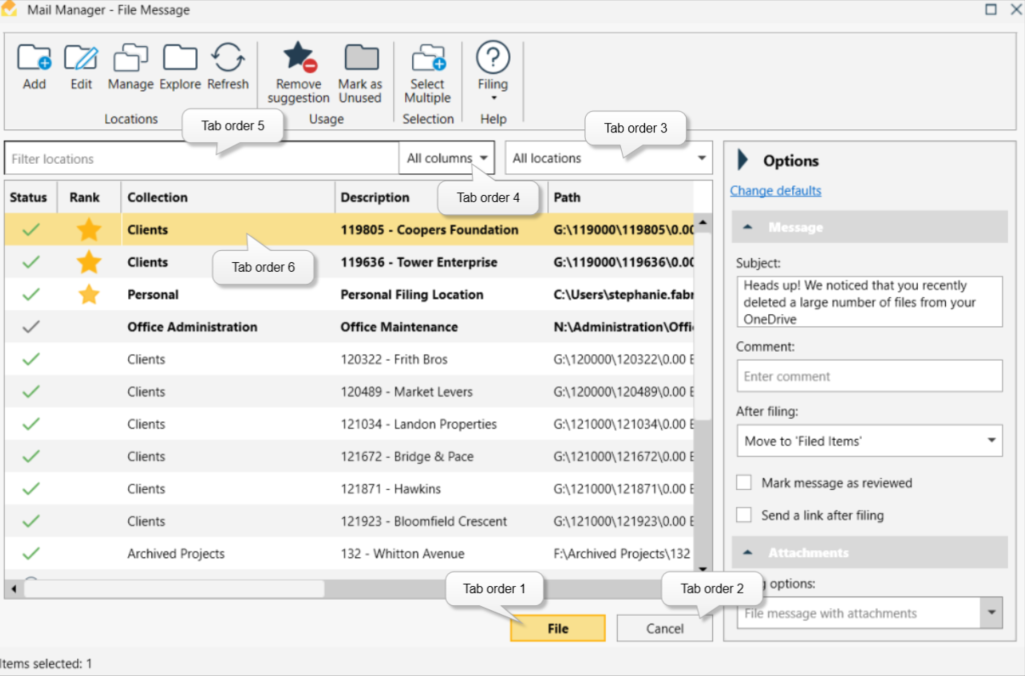
|
Tab order |
Received emails | Sent emails |
| 1 | File button | Send & File |
| 1a | Send Only | |
| 2 | Cancel button | Cancel button |
| 3 | All locations menu | All locations menu |
| 4 | All columns menu | All columns menu |
| 5 | Filter locations | Filter locations |
| 6 | List of locations | List of locations |
-
When messages are filed they will be filed using the default options.
-
You can change the options by expanding the Options pane on the right of the window:
To change your default options select the link Change defaults, this will open the Filing section of the User Preferences where you can make your changes.
-
Before filing, the subject line of the message can be modified as required.
- Useful when the subject line is blank or the current subject is inappropriate.
- When the subject is modified the filer's initials will be automatically appended to the Filename.
-
When filing a message you may want to add a comment that does not alter the subject and body text, but will still allow you to search based on the comment at a later date.
-
Just type your comment into the comment field.
-
When a comment is added the filers initials will be automatically appended to the Filename.
-
See below steps to display the Comment column in Outlook
Repeat the procedure for other folders.
-
Whilst filing via the filing window, categories can be selected from the drop down menu and saved with the message.
-
See Filing for more about categories.
-
Append filed date & time to subject line - The subject line of the original message will be modified to indicate when it was filed.
-
Move to 'Deleted Items' - This option will move the original message to the 'Deleted Items' folder of the same mailbox.
-
Move to 'Filed Items' - Moves the original message to the 'Filed Items' folder of the same mailbox. When required the 'Filed Items' sub-folder will be created automatically.
-
Move to Filed Folders - Moves the original message to a sub-folder of the Inbox assigned to a Filed Folders (Previously called Drop Folders) location. Messages moved to a Filed folder are automatically filed and receive a Filed by Mail Manager category.
-
Filed emails are organised into separate folders and remain visible in the Field Fodler
-
When enabled, Mail Manager will dynamically create sub-folders in your Outlook Inbox (a Filed Folder), naming it with the description of the filing location.
-
After filing the email to the chosen location, the original email is moved to the Filed Folder and receives a 'Filed by Mail Manager' category indicating it has been successfully filed.
Previous Drop Folder users
If you had Drop Folders enabled, your Drop Folders will be automatically converted to Filed Folders. Any new messages filed to the Filed Folders will remain visible in the folder and filed messages will receive a 'Filed by Mail Manager' category. Filing to a new filing location using the Mail Manager ribbon or using the right-click option will create new Filed Folder that will remain below the Inbox parent folder. -
Filing to Filed Folders for the first time
-
Select the message that you want to file.
-
Use the File Email option in the ribbon or toolbar to select a Filing location, or use the right click to file option.
-
After selecting the chosen location, Mail Manager will recognize that the Filed Folder has not been created and will dynamically create one.
-
The original email will be moved from your Inbox to the Filed Folder.
-
-
Filing to Filed Folders using the Drag and Drop functionality
-
Drag & drop emails into Filed Folders to queue the emails for filing.
-
-
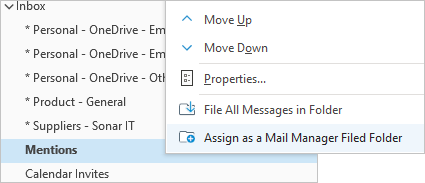
Assign a current Inbox sub-folder as a Filed Folder
-
Right click on the existing Outlook sub-folder and select the option 'Assign as Mail Manager Filed Folder' to associate the folder with a filing location.
-
Mail Manager will direct the user to the location picker to select a filing location.
-
The existing Outlook sub-folder will be renamed according to the name of the Filed Folder and based on the filing location information in the User Preferences.
-
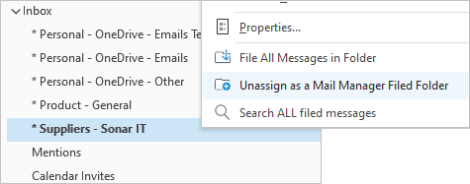
Unassign a current Filed Folder from a filing location
-
Right click on the Filed Folder and select 'Unassign as Mail Manager Filed Folder'.
-
The existing Filed Folder name will remain unchanged, however the prefix will disappear.
-
-
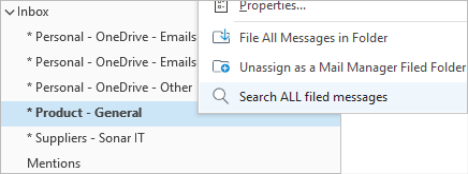
Search All messages in Filed Folder
-
Right-click on the Filed Folder and select 'Search ALL filed messages'.
-
The search window opens and the Filing location is pre-populated with the Filed Folder.
-
-
Filing with Mobile Devices and Outlook Web Add-In (OWA)
-
Filed Folders can be used with mobile devices such as phones, tablets and Outlook on the Web, to allow users to navigate filed messages when away from Outlook on the PC.
-
However, messages filed to Filed Folders still require Outlook to file the messages i.e. when the Filed Folders are synchronised back on the PC they will be filed by Mail Manager.
-
-
To identify to other colleagues that you have reviewed or seen the message, in a similar way that you might initial or sign a paper document, you can update the subject line to include when you reviewed the message.
-
Rather than forwarding or copying a message on to others and creating duplicates, Mail Manager can be used to file a single message and automatically generate a notification email containing links to the message once filed
-
This "lightweight" email can be sent to other colleagues. Upon receipt the colleagues can select the links to open the filed message.
-
The default font used for the link can be controlled via the User Preferences.
-
In the same way that Mail Manager files messages it can also file attachments.
-
When an option is selected to copy the attachment you will be prompted to select the required folder.
-
The default option can be set in the User Preferences.
-
Default list of attachment options:
-
File message with attachments
-
File message and copy attachments
-
File attachments only
-
-
Using Admin Preferences, there is an option to "Remove Attachments" when filing. If enabled, the following will be available:
-
File message and move attachments
-
If selected, the message will be filed without the attachment and you will be prompted to select the folder to move the attachments to. The message will contain two files attached:
-
File 1: A .txt file naming the removed attachments
-
File 2: An .htm file containing hyperlinks that can be used to quickly locate the attachments that were removed.
Note: Your default internet security settings may prevent the ability to double-click the link.
-
-
File message without attachments
-
Files the message without any attachments.
-
The name of any attachments will be listed in an attached .txt file.
-
-
File attachments only
-
Files the attachments and leaves the message, complete with the attachments in the Outlook folder.
-
-
-
Selecting the attachment folder
-
When filing attachments separately, the "file..." button will open the attachments window
-
Initially all attachments will be highlighted and selected (only selected attachments will be filed).
-
Selecting the Browse button will assign the selected folder to the highlighted locations.
-
Note: Browsing SharePoint folders is NOT supported
-
Suggested locations for attachment are available via the Browse arrow button.
-
Click and drag, as well as using the shift and ctrl keys to highlight attachments.
-
-
Mail Manager can be used to file multiple messages in the same folder by selecting messages using the Shift and/or Ctrl keys.
-
However if you need to file all the messages in a folder including sub-folders then use the File All Messages in Folder option as explained below:
-
Select the Outlook folder containing the messages to be filed
-
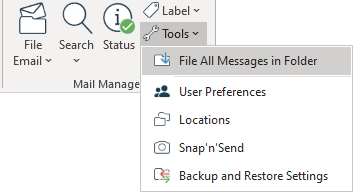
Option 1: Right-click and choose File All Messages in Folder
-
Option 2: Select the "Tools" button from the Mail Manager ribbon or toolbar and choose "File All Messages in Folder" from the drop-down menu
-
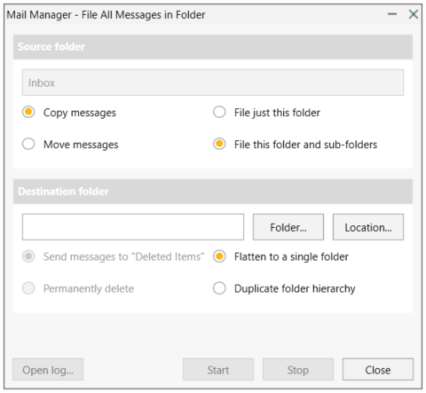
The "File All Messages in Folder" window box will appear
-
Select either the "Folder..." or "Location..." button to select the destination folder (where the messages will be filed to) and choose the options as required.
-
When ready select the Start button. Hover the mouse over the progress bar to see its current progress.
-
For a summary of the filed information select the "Open log..." button. The logging information can be found in the file called: BatchFilerlog.txt, located in the folder called: %AppData%\28hands\Mail Manager
Check all messages are filed:
If there is doubt whether all messages were filed, repeat the filing process, but select "Move messages" and "Permanently delete" options. As Mail Manager processes the messages it will detect that they have already been filed and will skip the filing process, but remove the original message in the source folder. Any messages that were not filed will remain in the source folder. -
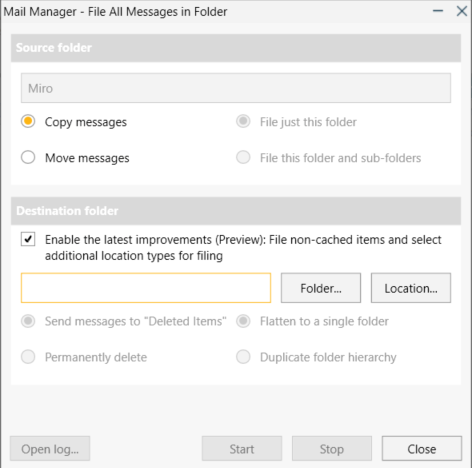
Note: The following features are available from version 12.1
To enable the features from 12.1 onwards, select the tick box to enable the Preview.
-
File non-cached items
-
Now adds the 'Filed by Mail Manager' category
-
Now adds the filed date and time to the subject line of the filed items
-
Now supports filing of appointments, reports, and meeting requests and responses
-
After filing items are not moved or deleted
-
Support filing from Shared Mailboxes, Public Folders and .PST files
-
Supports additional protocols such as SharePoint, Teams, OneDrive, Procore, Huddle (other protocols may be supported but are untested)
-
A summary of the activity of messages processed, filed, errors, duplicates etc.
When sending messages to "Deleted Items" you can redirect them to an alternative Outlook folder by manually adding an additional setting called DeletedItemsFolder into the EmailFiling.cfg with Notepad e.g.
DeletedItemsFolder=\\Archives\Deleted Items
-
When sending a new message, you can be prompted to file it using the filing window.
-
To configure the prompt, navigate to User Preferences and enable the applicable prompts.

