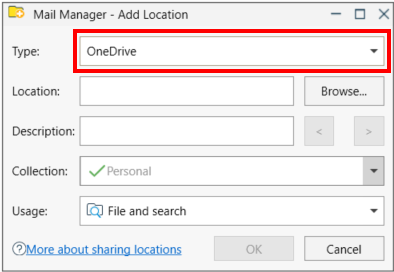
Mail Manager supports the filing and searching of messages located in OneDrive for Business without the need to use locally sync'd folders.
| • | OneDrive for Business |
| • | Microsoft 365 work or school account |
| 1. | Open the Add Location window via: File message window Locations tool The Add Location window will appear:  |
| 2. | Select the type of location to be added i.e. OneDrive |
| 3. | Select a OneDrive folder or sub-folder e.g. |
| i. | Select the Browse button to navigate to the required folder or |
| ii. | Using a web browser, navigate to your OneDrive for Business folder and copy its full path from the address bar to the clipboard e.g. https://mailmanager-my.sharepoint.com/personal/<user_name>/documents/Emails... Then paste the path into the Location text field |
| 4. | Add an appropriate description |
| 5. | Select a Collection to which the location will be added to |
| 6. | If required change the Usage. The default is File and Search. If the Search option is selected the location won't appear when filing. |
| 7. | Select OK |
| 8. | Exit and save the changes when prompted |
Up to 30 minutes later you will be able to search items that have been filed into your OneDrive filing locations.
Notes:
| • | OneDrive for Business locations are not verified like they are for local and network folders, therefore the locations status column will be empty. |